Änderungsstand: 2021-12-14
Docker-Compose muss im Unraid installiert sein! Hier der Guide dazu.
Nun das Erstellen eines Compose-Stack mittels Portainer. Immer wieder kommen Anfragen diesbezüglich. Ich persönlich verwende diese Möglichkeit nicht. Wer wissen möchte, wie ich das realisiere, verwendet den vorherigen Guide 🙂 .
Es wird folgendes Szenario eingerichtet: Nextcloud:FPM mit PostgreSQL als Datenbank, einem Redis-Cache, einem eigenen NginX-Webserver. Portainer wird als Docker unter Unraid vorausgesetzt. Am Ende werde ich das Script noch etwas abändern und Adminer hinzufügen. Da das aber im Normalfall nicht benötigt wird, gehe ich auch nicht gesondert darauf ein.
Nun, da jetzt Docker-Compose läuft, lege ich eine NginX-Konfigurationsdatei an. Dafür erstelle ich unter appdata einen weiteren Ordner Namens Composevolumes. Dort lege ich dann auch die einzelnen Docker-Compose-Configs ab, damit die Übersicht erhalten bleibt und das Ganze nicht mit den normalen Docker-Configs von Unraid vermischt wird:
mkdir -p /mnt/user/appdata/Composevolumes/Nextcloud-Nginx
nano /mnt/user/appdata/Composevolumes/Nextcloud-Nginx/nginx.conf
worker_processes auto;

error_log  /var/log/nginx/error.log warn;
pid        /var/run/nginx.pid;


events {
    worker_connections  1024;
}


http {
    include       /etc/nginx/mime.types;
    default_type  application/octet-stream;

    log_format  main  '$remote_addr - $remote_user [$time_local] "$request" '
                      '$status $body_bytes_sent "$http_referer" '
                      '"$http_user_agent" "$http_x_forwarded_for"';

    access_log  /var/log/nginx/access.log  main;

    sendfile        on;
    #tcp_nopush     on;

    keepalive_timeout  65;

    #gzip  on;

    upstream php-handler {
        server app:9000;
    }

    server {
        listen 80;

        # HSTS settings
        # WARNING: Only add the preload option once you read about
        # the consequences in https://hstspreload.org/. This option
        # will add the domain to a hardcoded list that is shipped
        # in all major browsers and getting removed from this list
        # could take several months.
        #add_header Strict-Transport-Security "max-age=15768000; includeSubDomains; preload;" always;

        # set max upload size
        client_max_body_size 512M;
        fastcgi_buffers 64 4K;

        # Enable gzip but do not remove ETag headers
        gzip on;
        gzip_vary on;
        gzip_comp_level 4;
        gzip_min_length 256;
        gzip_proxied expired no-cache no-store private no_last_modified no_etag auth;
        gzip_types application/atom+xml application/javascript application/json application/ld+json application/manifest+json application/rss+xml application/vnd.geo+json application/vnd.ms-fontobject application/x-font-ttf application/x-web-app-manifest+json application/xhtml+xml application/xml font/opentype image/bmp image/svg+xml image/x-icon text/cache-manifest text/css text/plain text/vcard text/vnd.rim.location.xloc text/vtt text/x-component text/x-cross-domain-policy;

        # Pagespeed is not supported by Nextcloud, so if your server is built
        # with the `ngx_pagespeed` module, uncomment this line to disable it.
        #pagespeed off;

        # HTTP response headers borrowed from Nextcloud `.htaccess`
        add_header Referrer-Policy                      "no-referrer"   always;
        add_header X-Content-Type-Options               "nosniff"       always;
        add_header X-Download-Options                   "noopen"        always;
        add_header X-Frame-Options                      "SAMEORIGIN"    always;
        add_header X-Permitted-Cross-Domain-Policies    "none"          always;
        add_header X-Robots-Tag                         "none"          always;
        add_header X-XSS-Protection                     "1; mode=block" always;

        # Remove X-Powered-By, which is an information leak
        fastcgi_hide_header X-Powered-By;

        # Path to the root of your installation
        root /var/www/html;

        # Specify how to handle directories -- specifying `/index.php$request_uri`
        # here as the fallback means that Nginx always exhibits the desired behaviour
        # when a client requests a path that corresponds to a directory that exists
        # on the server. In particular, if that directory contains an index.php file,
        # that file is correctly served; if it doesn't, then the request is passed to
        # the front-end controller. This consistent behaviour means that we don't need
        # to specify custom rules for certain paths (e.g. images and other assets,
        # `/updater`, `/ocm-provider`, `/ocs-provider`), and thus
        # `try_files $uri $uri/ /index.php$request_uri`
        # always provides the desired behaviour.
        index index.php index.html /index.php$request_uri;

        # Rule borrowed from `.htaccess` to handle Microsoft DAV clients
        location = / {
            if ( $http_user_agent ~ ^DavClnt ) {
                return 302 /remote.php/webdav/$is_args$args;
            }
        }

        location = /robots.txt {
            allow all;
            log_not_found off;
            access_log off;
        }

        # Make a regex exception for `/.well-known` so that clients can still
        # access it despite the existence of the regex rule
        # `location ~ /(\.|autotest|...)` which would otherwise handle requests
        # for `/.well-known`.
        location ^~ /.well-known {
            # The rules in this block are an adaptation of the rules
            # in `.htaccess` that concern `/.well-known`.

            location = /.well-known/carddav { return 301 /remote.php/dav/; }
            location = /.well-known/caldav  { return 301 /remote.php/dav/; }

            location /.well-known/acme-challenge    { try_files $uri $uri/ =404; }
            location /.well-known/pki-validation    { try_files $uri $uri/ =404; }

            # Let Nextcloud's API for `/.well-known` URIs handle all other
            # requests by passing them to the front-end controller.
            return 301 /index.php$request_uri;
        }

        # Rules borrowed from `.htaccess` to hide certain paths from clients
        location ~ ^/(?:build|tests|config|lib|3rdparty|templates|data)(?:$|/)  { return 404; }
        location ~ ^/(?:\.|autotest|occ|issue|indie|db_|console)                { return 404; }

        # Ensure this block, which passes PHP files to the PHP process, is above the blocks
        # which handle static assets (as seen below). If this block is not declared first,
        # then Nginx will encounter an infinite rewriting loop when it prepends `/index.php`
        # to the URI, resulting in a HTTP 500 error response.
        location ~ \.php(?:$|/) {
            # Required for legacy support
            rewrite ^/(?!index|remote|public|cron|core\/ajax\/update|status|ocs\/v[12]|updater\/.+|oc[ms]-provider\/.+|.+\/richdocumentscode\/proxy) /index.php$request_uri;

            fastcgi_split_path_info ^(.+?\.php)(/.*)$;
            set $path_info $fastcgi_path_info;

            try_files $fastcgi_script_name =404;

            include fastcgi_params;
            fastcgi_param SCRIPT_FILENAME $document_root$fastcgi_script_name;
            fastcgi_param PATH_INFO $path_info;
            #fastcgi_param HTTPS on;

            fastcgi_param modHeadersAvailable true;         # Avoid sending the security headers twice
            fastcgi_param front_controller_active true;     # Enable pretty urls
            fastcgi_pass php-handler;

            fastcgi_intercept_errors on;
            fastcgi_request_buffering off;
        }

        location ~ \.(?:css|js|svg|gif)$ {
            try_files $uri /index.php$request_uri;
            expires 6M;         # Cache-Control policy borrowed from `.htaccess`
            access_log off;     # Optional: Don't log access to assets
        }

        location ~ \.woff2?$ {
            try_files $uri /index.php$request_uri;
            expires 7d;         # Cache-Control policy borrowed from `.htaccess`
            access_log off;     # Optional: Don't log access to assets
        }

        # Rule borrowed from `.htaccess`
        location /remote {
            return 301 /remote.php$request_uri;
        }

        location / {
            try_files $uri $uri/ /index.php$request_uri;
        }
    }
}
Strg-x, y, Enter
Quelle:
.
Portainer:
Nun erstelle ich im Portainer das Docker-Compose-Script. Die Config-Dateien der jeweiligen Docker lege ich ebenfalls in das Dockervolumes-Verzeichnis. Somit muss ich am Ende nicht unnötig suchen. Das Nextcloud-Datenverzeichnis lege ich auf das Array zu mnt/user/data/NextcloudComposeData:
- Stacks
- + Add stack
- Name: nextcloudcompose
- + Add stack
Folgenden Test-Code füge ich hinzu:
version: '2'

services:
  db:
    image: postgres
    restart: always
    volumes:
      - /mnt/user/appdata/Composevolumes/PostgresData:/var/lib/postgresql/data
    environment:
      - POSTGRES_DB=nextcloud
      - POSTGRES_USER=nextcloud
      - POSTGRES_PASSWORD=PASSWORT456

  redis:
    image: redis:alpine
    restart: unless-stopped
    command: redis-server --requirepass PASSWORT789 # Redis Passwort

  app:
    image: nextcloud:fpm
    restart: always
    volumes:
      - /mnt/user/appdata/Composevolumes/NextcloudConfig:/var/www/html
      - /mnt/user/data/NextcloudComposeData:/var/www/html/data
    environment:
      - REDIS_HOST=redis
      - REDIS_HOST_PASSWORD=PASSWORT789 # Redis Passwort von oben
      - POSTGRES_HOST=db
      - POSTGRES_DB=nextcloud
      - POSTGRES_USER=nextcloud
      - POSTGRES_PASSWORD=PASSWORT456
    links:
      - db
      - redis

  web:
    image: nginx
    restart: always
    ports:
      - 8099:80
    links:
      - app
    volumes:
      - /mnt/user/appdata/Composevolumes/Nextcloud-Nginx/nginx.conf:/etc/nginx/nginx.conf:ro
    volumes_from:
      - app

volumes:
  db:
  nextcloud:
  redis:
Anschließend „Deploy the stack“ klicken.
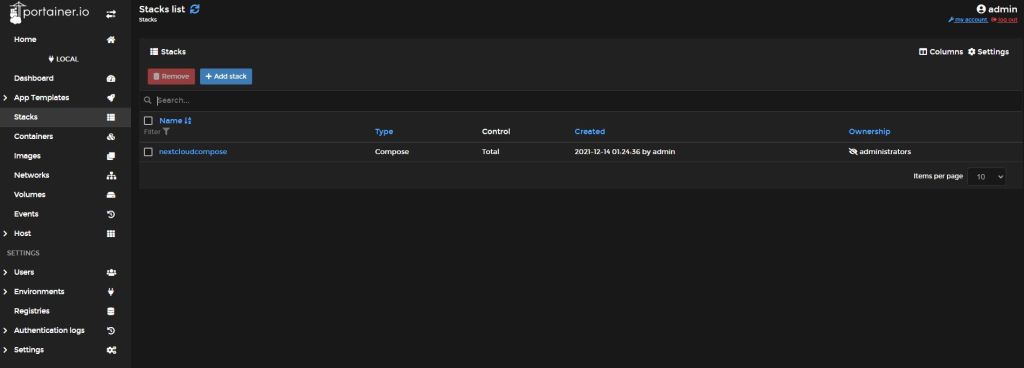
Der Vorgang dauert nun eine ganze Weile. Wurde der Befehl abgearbeitet, erscheint der erste verfügbare Stack – meine soeben erstellte Docker-Compose.
Klickt man diesen Stack an, erscheint eine Übersicht der laufenden Docker im Stack:

.
Bevor man nun Nextcloud im Browser startet, ca. 1 Minute warten, damit die Datenbank initialisiert werden kann. Ansonsten erhält man einen „502 Bad Gateway“ – Fehler.
Um Nextcloud zu starten, im Browser folgendes eingeben:
Server-IP:8099
Hier muss man nur ein Benutzer-Konto anlegen. Der Rest, Datenbankzuweisung und Zugangsnamen und Passwort, wird im Script direkt zugewiesen und benötigt keine weitere Aufmerksamkeit.
Verwendet man Nextcloud nur intern, kann man das nun Folgende vernachlässigen. Aber dafür ist das eigentlich zu schade 🙂 . Obendrein verwende ich hier das originale Nextcloud. Das heißt, dass der interne Zugriff über http erfolgt. Interner Zugriff über http s, wenn auch nur Selbstsigniert, kann nur linuxserver/nextcloud. Von anderen, selbstgebastelten Nextcloudimages, mal abgesehen.
Jetzt wäre es sinnvoll, Nginx Proxy Manager als normale Dockeranwendung zu installieren. Hier ist der Guide dazu. Das Grafana-Beispiel am Ende des Guides wird nicht benötigt. Ich richte jetzt NPM für die hier im Guide vorgestellte Nextcloud-Version ein. Meine erstellte Testdomain lautet troubadix.duckdns.org. Auf dieser Domain bezieht sich das Folgende.
Nginx Proxy Manager für Nextcloud einrichten:
„NginX Proxy Manager“ Weboberfläche:
- „Host“
- „Proxy Host“
- „Add Proxy Host“
- Details:
- Domain Names: nextcloud.troubadix.duckdns.org
- (Eigene Domain verwenden)
- Scheme: http
- (8099 ist ein HTTP-Port)
- Forward Hostname / IP: die Server-IP, worauf sich Nextcloud befindet
- Forward Port: 8099
- (8099 ist mein Nextcloud – Port)
- Cache Assets: On
- Websockets Support: On
- Block Common Exploits: On
- Access List: nichts ändern
- Domain Names: nextcloud.troubadix.duckdns.org
- SSL:
- SSL Certificate: „Request a new SSL Certificate“
- Force SSL: On
- Http/2 Support: On
- HSTS Enabled: ON
- Email Address for Lets‘ Encrypt: Eine gültige Email-Adresse
- I Agree to the LE Terms of Service: On
- Advanced:
- Details:
- „Add Proxy Host“
- „Proxy Host“
location ^~ /.well-known {
location = /.well-known/carddav     { return 301 /remote.php/dav/; }
location = /.well-known/caldav      { return 301 /remote.php/dav/; }
location ^~ /.well-known            { return 301 /index.php$uri; }
try_files $uri $uri/ =404;
  }
Save
Nach ca. 10-20 Sekunden wurde das Zertifikat erstellt und der Dienst Nextcloud ist unter der angewendeten Domain, gesichert, von Außen erreichbar. Allerdings würde jetzt Nextcloud den Zugriff mit folgendem Fehler verweigern:

Um das zu beheben, muss ich noch die Konfigurationsdatei ändern.
Nextcloud-Konfigurationsdatei anpassen
(eigenes Konfigurationsverzeichnis verwenden)
nano /mnt/user/appdata/Composevolumes/NextcloudConfig/config/config.php
Folgendes am Ende, aber vor dem letzten ); einfügen:
  'default_phone_region' => 'DE',
  'overwriteprotocol' => 'https',
  'trusted_proxies' =>
   array (
     0 => '192.168.1.110:80',
   ),
Die Ip-Adresse unter Trusted Proxies ist die IP-Adresse meines „Nginx Proxy Manager“ inkl. Portangabe. Ich verwende dafür ein anderes Gerät. Deshalb steht dort auch eine andere IP-Adresse.
Die Zeile:
'overwrite.cli.url' => 'http://192.168.1.200:8099',
ändern in (eigene Domain verwenden):
'overwrite.cli.url' => 'https://nextcloud.troubadix.duckdns.org',
Dann die „Trusted Domains“ erweitern:
  array (
      0 => '192.168.1.200:8099',
      1 => 'nextcloud.troubadix.duckdns.org',
     2=> 'localhost',
  ),
Strg-x, y, Enter
Info: So in etwa sieht die Nextcloud-Config zum Schluss aus, wenn diese geändert wurde:
Bei Trusted Proxies wird die IP-Adresse:Port des Nginx Proxy Managers angegeben. Die IP-Adresse unter Trusted Domains ist die IP des Servers, auf dem NC installiert ist. Da ich NPM auf einem extra Gerät am Laufen habe, sind bei mir 2 verschiedene IP-Adressen angegeben.
Beispiel-Config:
<?php
$CONFIG = array (
  'htaccess.RewriteBase' => '/',
  'memcache.local' => '\\OC\\Memcache\\APCu',
  'apps_paths' =>
  array (
    0 =>
    array (
      'path' => '/var/www/html/apps',
      'url' => '/apps',
      'writable' => false,
    ),
    1 =>
    array (
      'path' => '/var/www/html/custom_apps',
      'url' => '/custom_apps',
      'writable' => true,
    ),
  ),
  'memcache.distributed' => '\\OC\\Memcache\\Redis',
  'memcache.locking' => '\\OC\\Memcache\\Redis',
  'redis' =>
  array (
    'host' => 'nextcloud-redis',
    'password' => 'PASSWORT789',
    'port' => 6379,
  ),
  'instanceid' => 'ogkft892jtbh',
  'passwordsalt' => 'cRWVUgFVJjl3jiOtBTGd2QnzVAlHRA',
  'secret' => 'SD0QceN3HJT+bBjDw2J31/mFGwK0xJMdwjVBmdq+Fw2sJbd1',
  'trusted_domains' =>
  array (
    0 => '192.168.1.200:8099',
    1 => 'nextcloud.troubadix.duckdns.org',
    2=> 'localhost',
  ),
  'datadirectory' => '/var/www/html/data',
  'dbtype' => 'pqsql',
  'version' => '23.0.0.10',
  'overwrite.cli.url' => 'https://nextcloud.troubadix.duckdns.org',
  'dbname' => 'nextcloud',
  'dbhost' => 'db',
  'dbport' => '',
  'dbtableprefix' => 'oc_',
  'mysql.utf8mb4' => true,
  'dbuser' => 'nextcloud',
  'dbpassword' => 'PASSWORT456',
  'installed' => true,
  'default_phone_region' => 'DE',
  'overwriteprotocol' => 'https',
  'trusted_proxies' =>
  array (
    0 => '192.168.1.50:80',
  ),
);
Optional: Stack neu starten:
Im Portainer den erstellten Stack auswählen, alle darin befindlichen Docker selektieren und Restart klicken. Das ist aber nur optional und muss nicht abgearbeitet werden!
Nextcloud kann nun über die Domain geöffnet werden. In meinem Fall ist das:
nextcloud.troubadix.duckdns.org
Es wird automatisch zu http s verbunden und Nextcloud ist, gesichert, erreichbar.
Wurde alles soweit übernommen, sind die Sicherheitshinweise, außer „Dem Modul php-imagick fehlt die SVG-Unterstützung“ behoben. Doch das ist relativ egal…
SSL Labs bringt ein A+ zur Ausgabe.
Adminer im Compose-Script:
Wer Adminer verwenden möchte, sei es um einfach Einsicht in der Datenbank zu erhalten oder um ein Backup (Export) der Datenbank anzulegen, kann dieses erweiterte Compose-Script verwenden. Hier sind alle Sachen von oben mit drin, inkl. hinzugefügtem Adminer:
version: '2'

services:
  db:
    image: postgres
    restart: always
    volumes:
      - /mnt/user/appdata/Composevolumes/PostgresData:/var/lib/postgresql/data
    environment:
      - POSTGRES_DB=nextcloud
      - POSTGRES_USER=nextcloud
      - POSTGRES_PASSWORD=PASSWORT456

  adminer:
    image: adminer
    restart: always
    ports:
      - 8098:8080
    links:
      - db

  redis:
    image: redis:alpine
    restart: unless-stopped
    command: redis-server --requirepass PASSWORT789 # Redis Passwort

  app:
    image: nextcloud:fpm
    restart: always
    volumes:
      - /mnt/user/appdata/Composevolumes/NextcloudConfig:/var/www/html
      - /mnt/user/data/NextcloudComposeData:/var/www/html/data
    environment:
      - REDIS_HOST=redis
      - REDIS_HOST_PASSWORD=PASSWORT789 # Redis Passwort von oben
      - POSTGRES_HOST=db
      - POSTGRES_DB=nextcloud
      - POSTGRES_USER=nextcloud
      - POSTGRES_PASSWORD=PASSWORT456
    links:
      - db
      - redis

  web:
    image: nginx
    restart: always
    ports:
      - 8099:80
    links:
      - app
    volumes:
      - /mnt/user/appdata/Composevolumes/Nextcloud-Nginx/nginx.conf:/etc/nginx/nginx.conf:ro
    volumes_from:
      - app

volumes:
  db:
  nextcloud:
  redis:
  adminer:
Aufruf von Adminer im Browser: Server-IP:8098

Datenbank System: PostgreSQL
Benutzer, Passwort und Datenbank eingeben, wie es im Script angelegt wurde.
Hierbei rate ich allerdings dringlichst ab, an dieser Stelle im Nginx Proxy Manager eine weitere Subdomain anzulegen, um darüber Adminer aufzurufen. Das sollte IMMER Local verwendet werden! Wer, aus welchen Gründen auch immer, nicht anders kann, sollte dann unbedingt Benutzer und Datenbank umbenennen und verschiedene Namen verwenden. Hierbei ist es auch sinnvoll, im NPM, ein separates Web-Passwort, für die Adminer-Domain, anzulegen.
.

Du muss angemeldet sein, um einen Kommentar zu veröffentlichen.